Set-up Git with Github / GitLab in Linux
We're going to workthrough with setting up your git with full functionality your Github / GitLab account with a Linux OS
@Joshue Abance
Tue May 30 2023
What is git ?
Git is a free and open source distributed version control system designed to handle everything from small to very large projects with speed and efficiency. [ref]
It was created by Linus Torvalds in 2005 and has since become one of the most widely used version control systems in software development.
Setup git
-
If you haven’t installed git yet on your machine, you can download it from the official website https://git-scm.com/downloads and make sure to follow the installation instructions for your own operating system.
https://git-scm.com/downloadsGit usually comes pre-installed on some Linux operating systems.
-
Setup your identity. The first thing you should do when you install Git is to set your user name and email address. This is important because every Git commit uses this information, and it’s immutably baked into the commits you start creating:
git config --global user.name "My Name"
git config --global user.email "myemail@mail.com"
You can ommit the
--globalif you want to use a different identity in a different repository.
Setup SSH Keys for Authentication
-
Open terminal and paste and run the following command
ssh-keygen -t ed25519 -C "your-github-or-gitlab-email@mail.com"-
Follow the instructions accordingly:
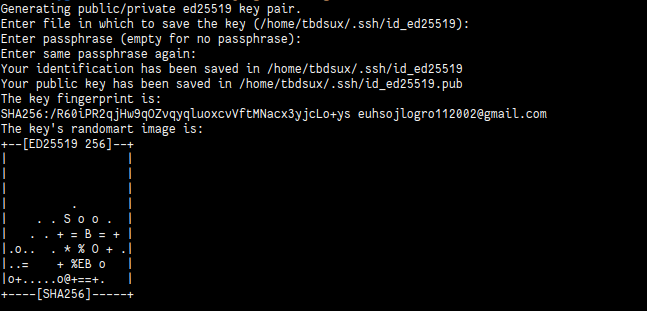
The key should be available in
/home/your-username/.ssh/[keyname].pub(it depends on how you set it)
-
-
Add the SSH key to
ssh-agent-
Start the
ssh-agentin the background.eval "$(ssh-agent -s)" # Output: # Agent pid [random number] -
Add you ssh key to
ssh-agentssh-add ~/.ssh/id_ed25519 # replace id_ed25519 with the name you set
-
-
Copy the contents of your pub key
cat ~/.ssh/id_ed25519.pub # replace id_ed25519 with the name you set # Output: # ssh-ed25519 AAAAC3NzaC1lZDI1NTE5AAAAIAC0gTjpr1XOA4OB1iK7rCL/3p1gDQu47bDEXRY8ysng your-email@gmail.com -
Add SSH Keys to your account
-
Go to your
Settings>SSH & GPG Keys>New SSH Key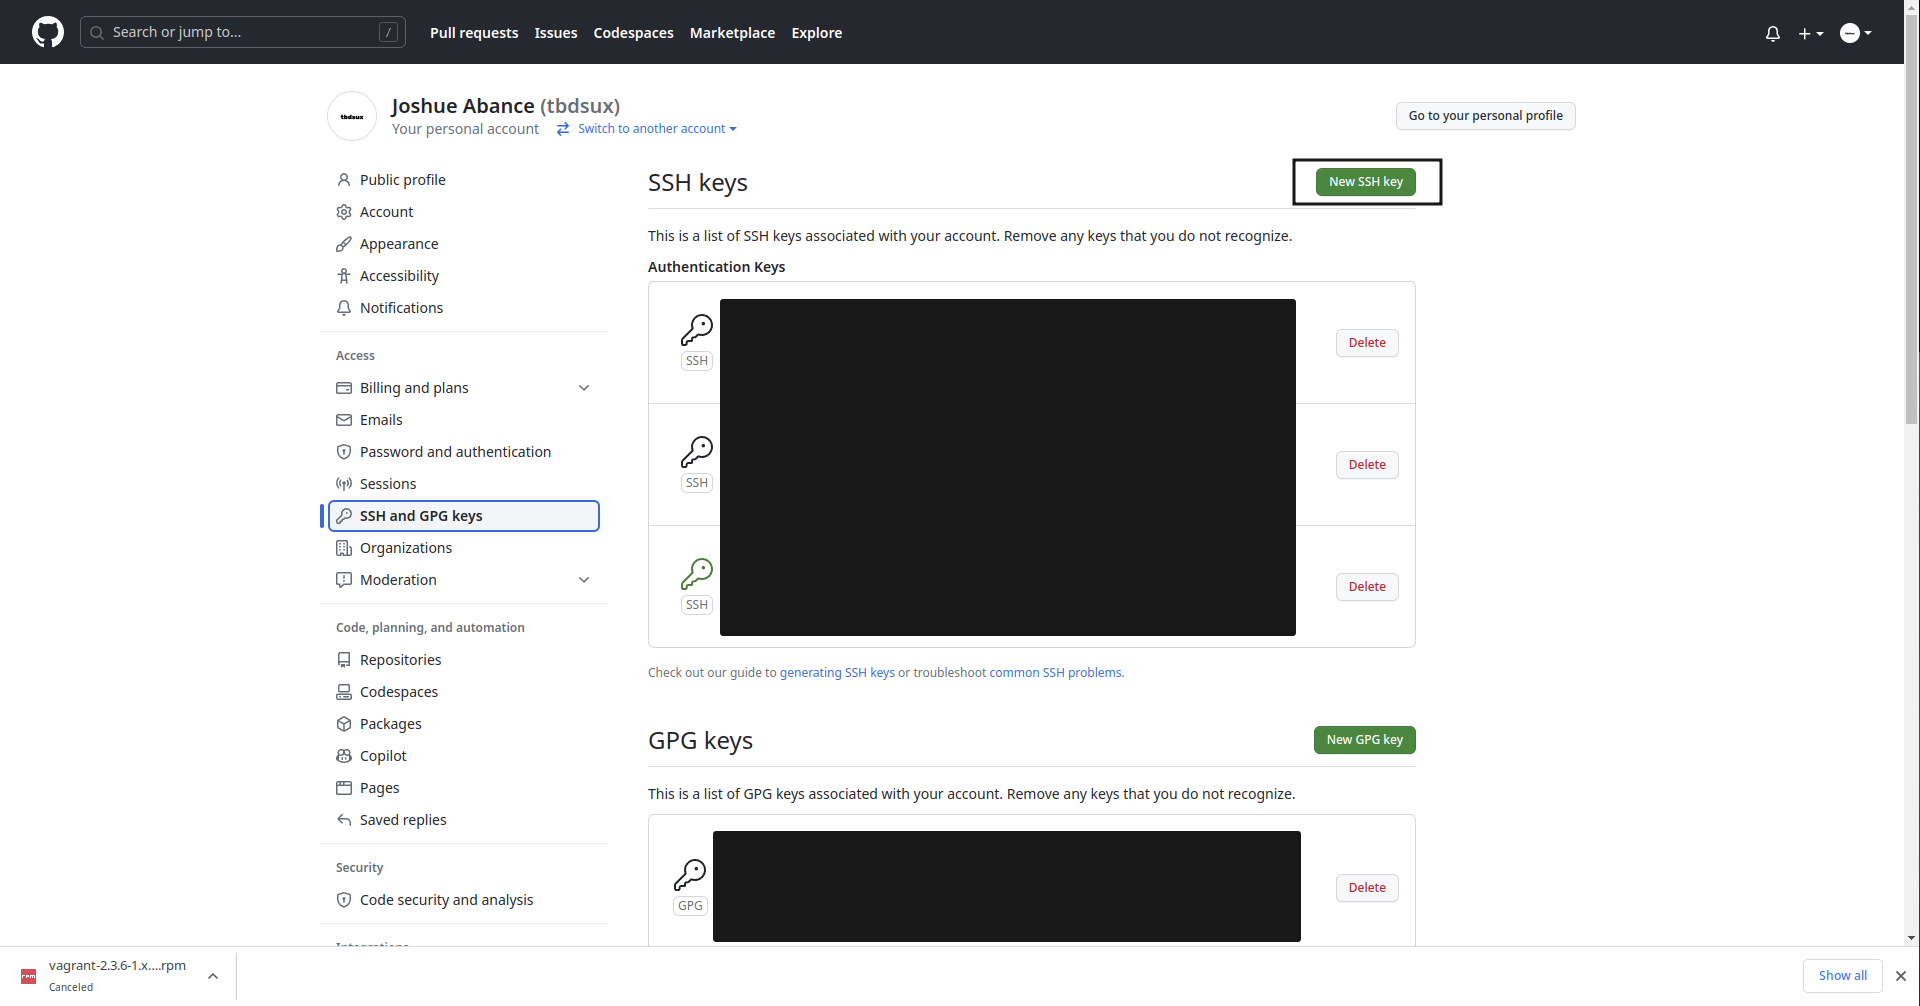
-
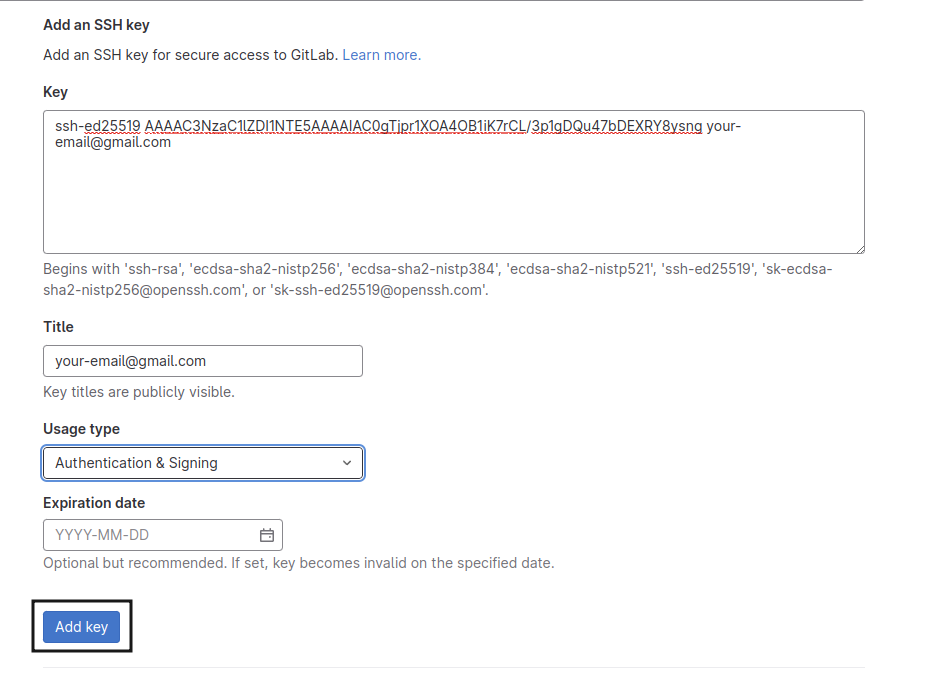
Add your key
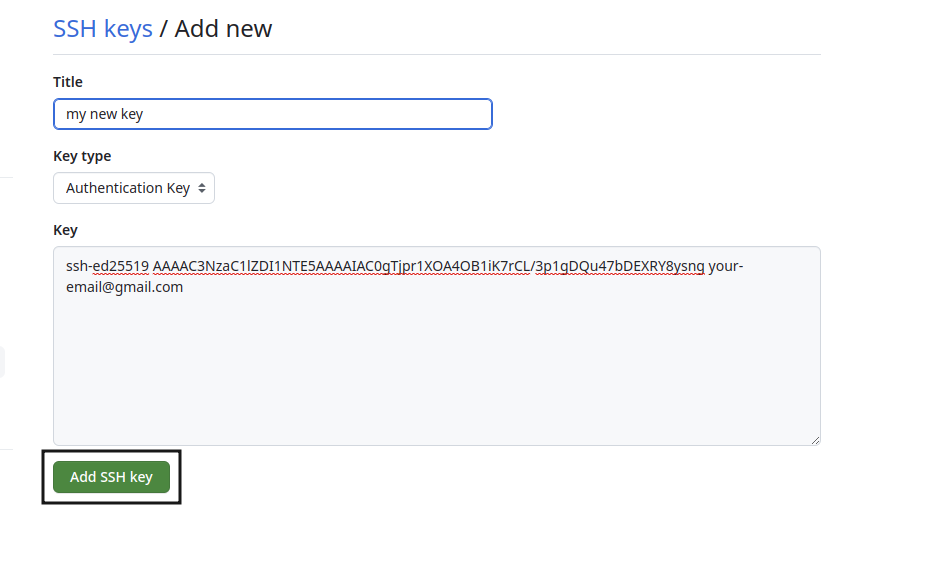
-
Click on your profile icon >
Preferences>SSH Keys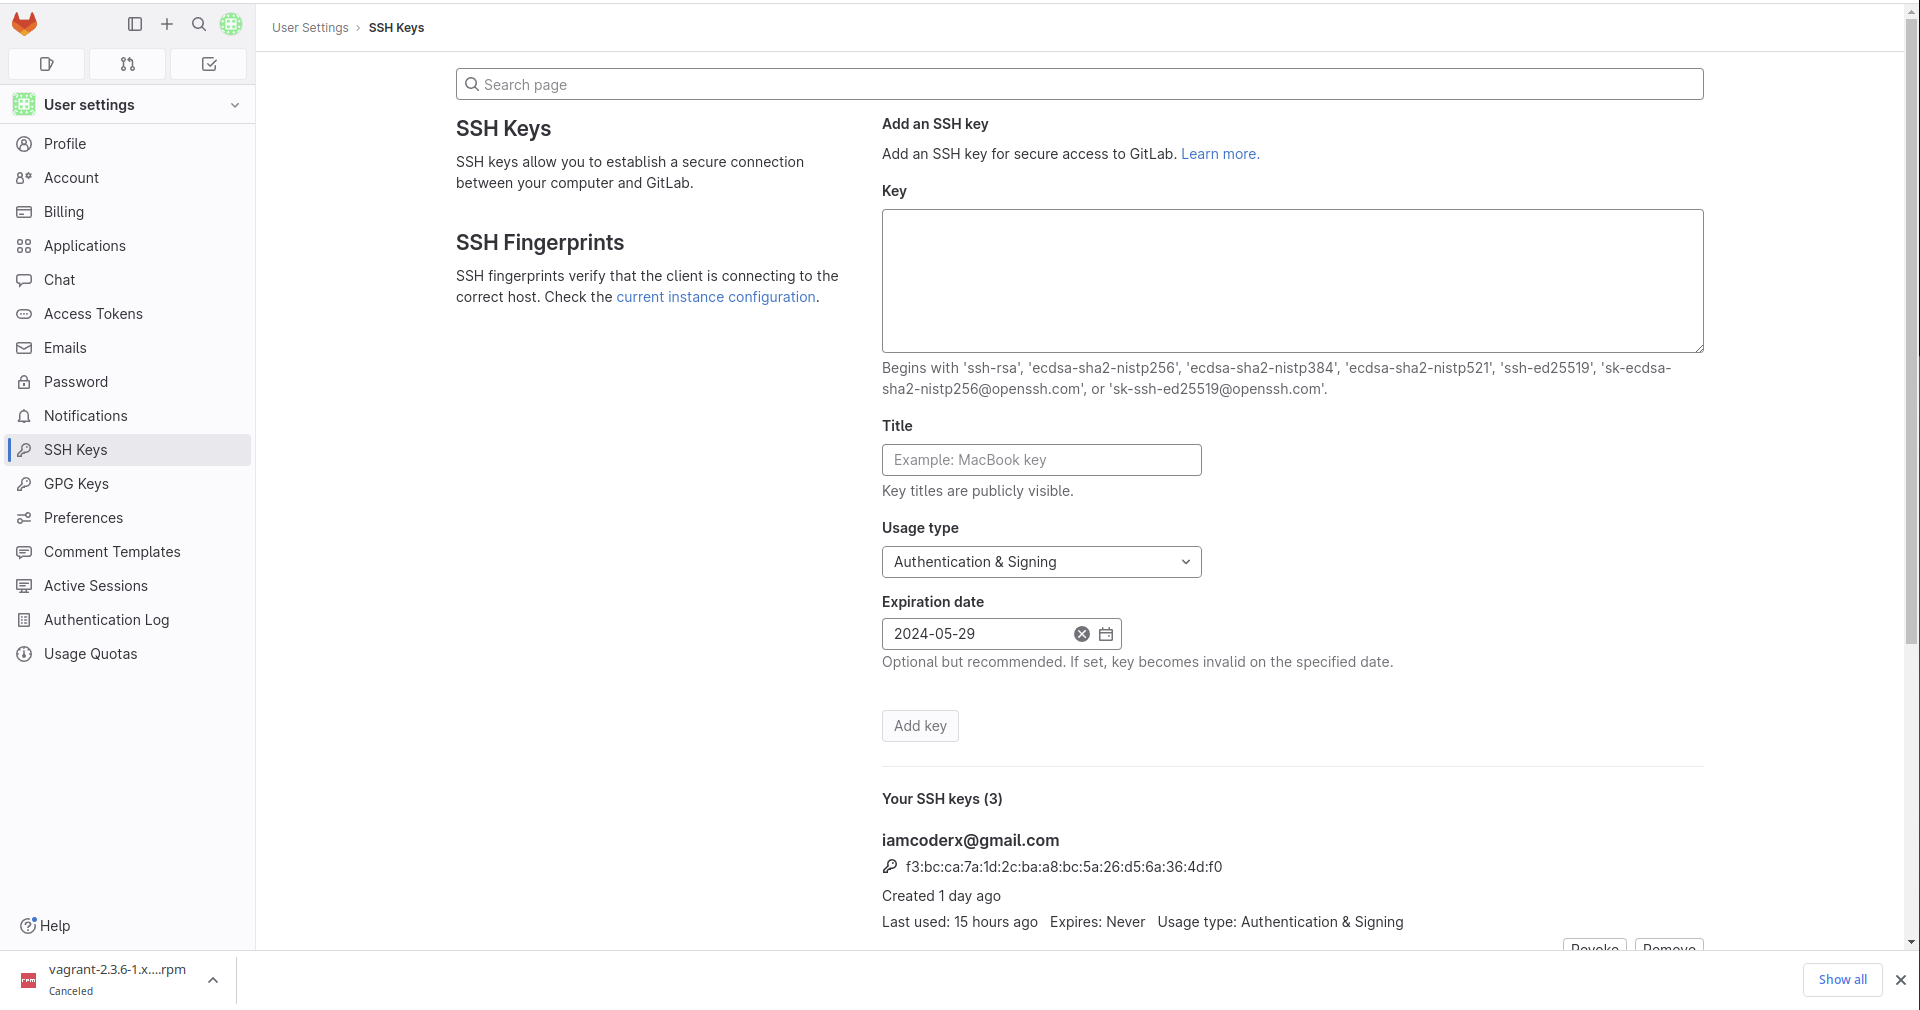
-
Add your key
You can set an expiration key when adding ssh keys (though I don’t recommend doing so as it is a hassle repeating the process once expired)
Authentication
Before logging in to your account, make sure to setup your git settings to save login details / credentials by running the following command:
git config --global credential.helper storeThe best way to start with authenticating with your GitHub / GitLab accounts with git is by creating a repository. Let’s start…
-
Start by creating a new repository (
https://github.com/new)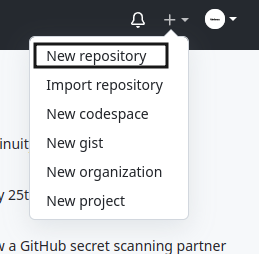
-
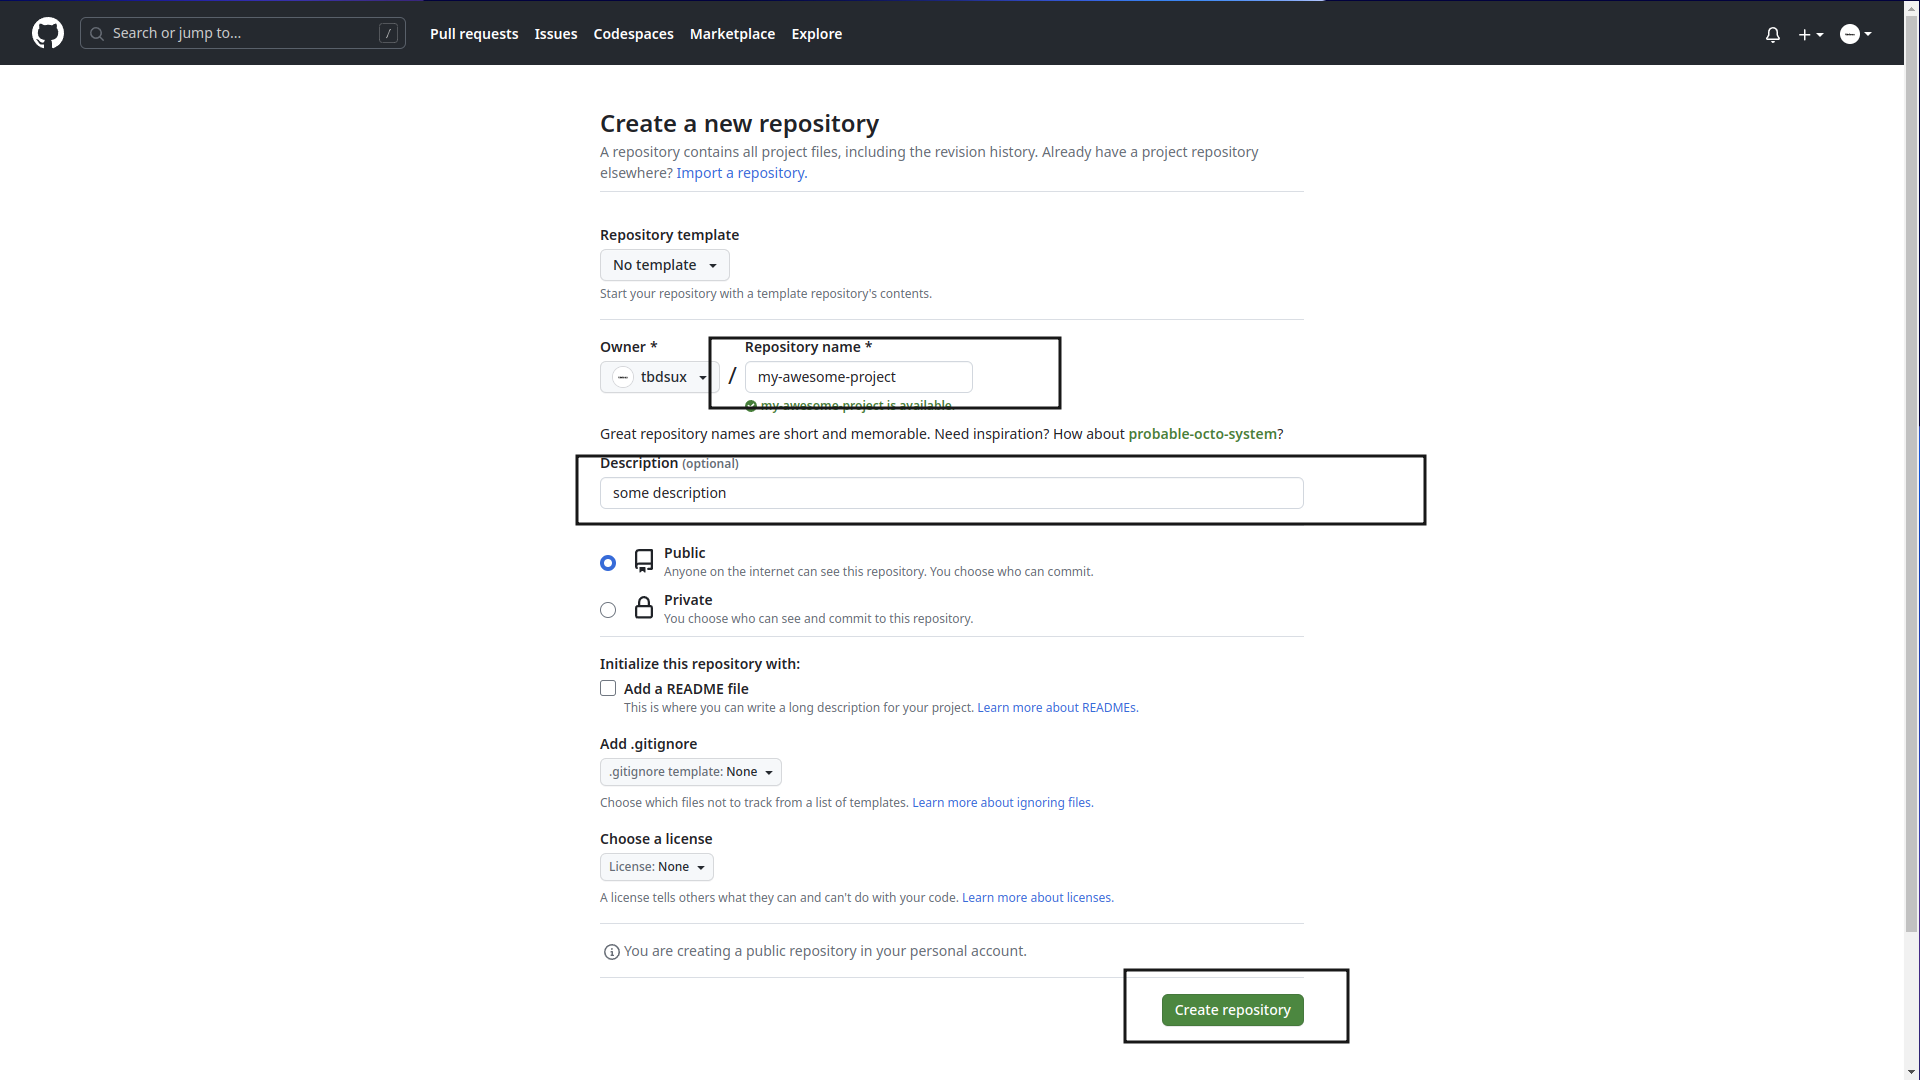
Add a project name (required) and description (not required)
-
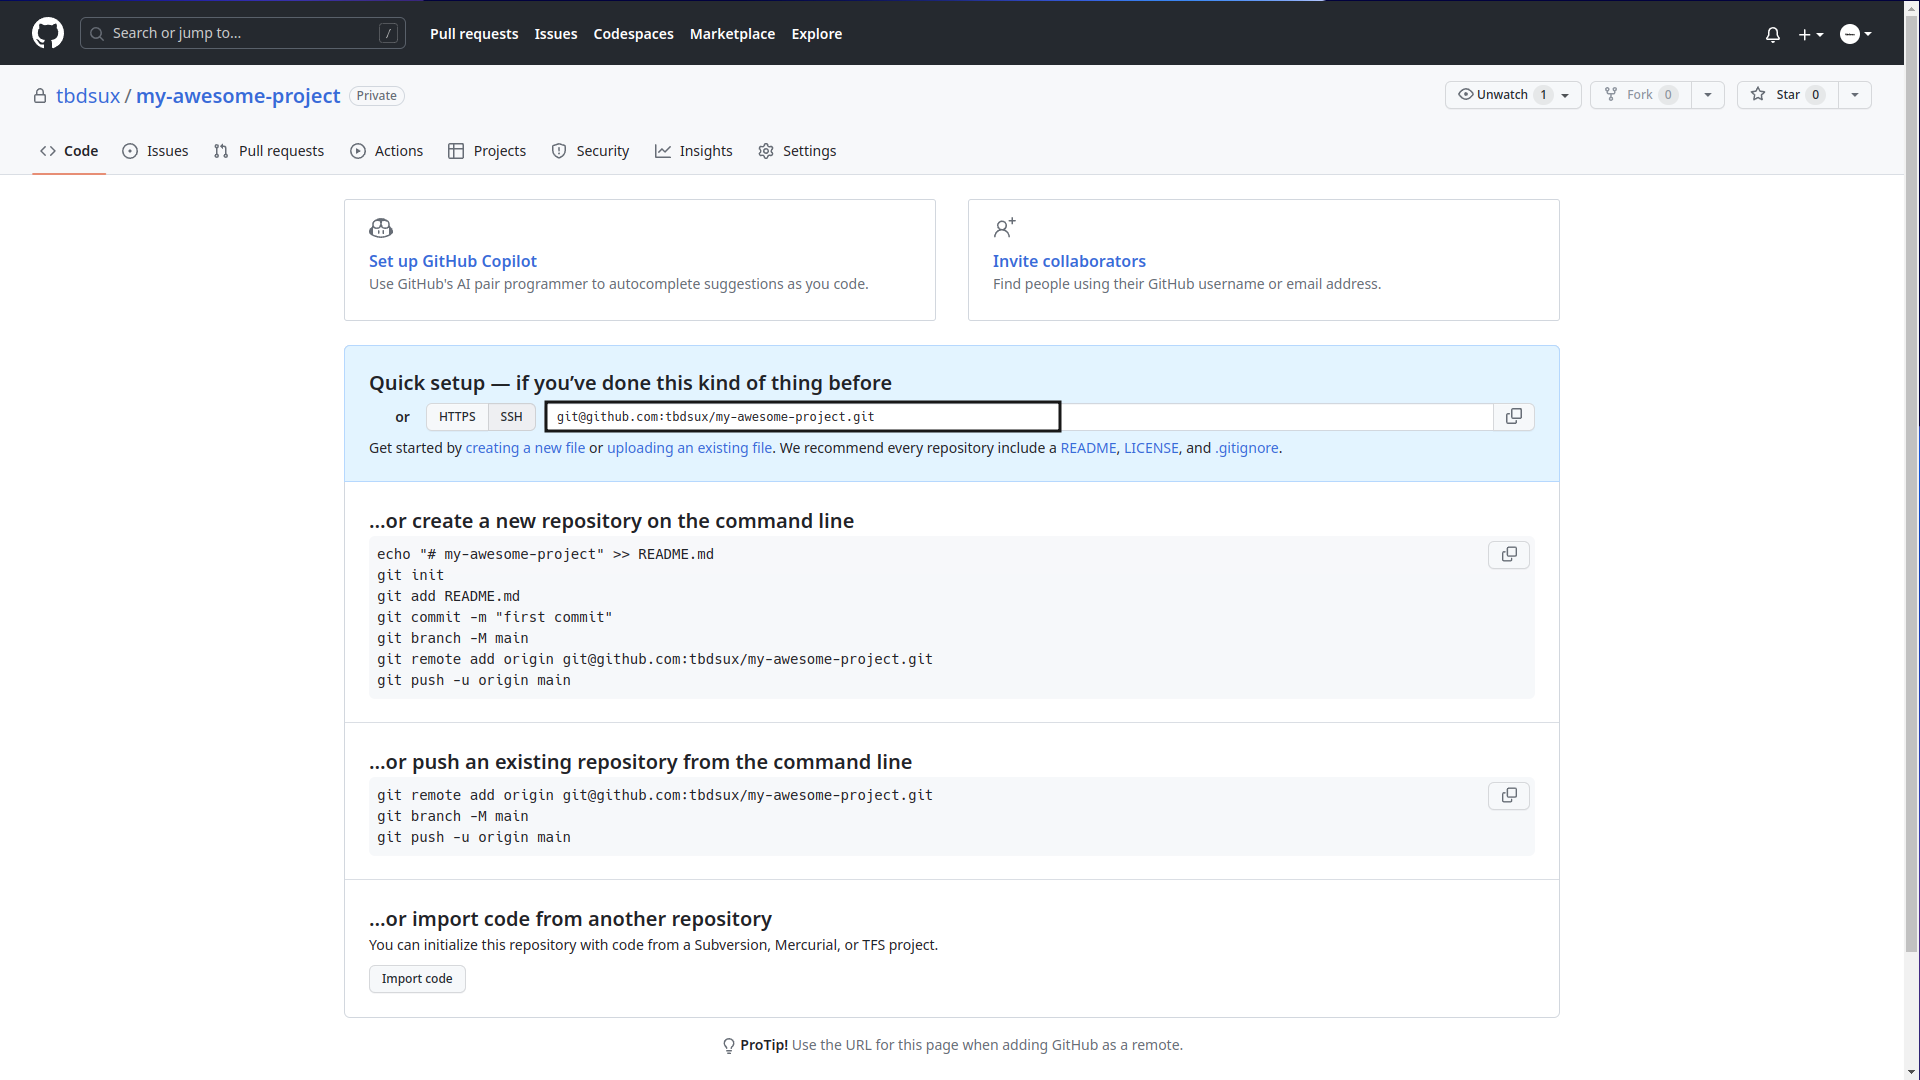
Copy the SSH url of your repository
-
Start by creating a new repository (
https://gitlab.com/projects/new)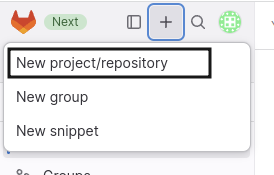
-
Add a project name (required)
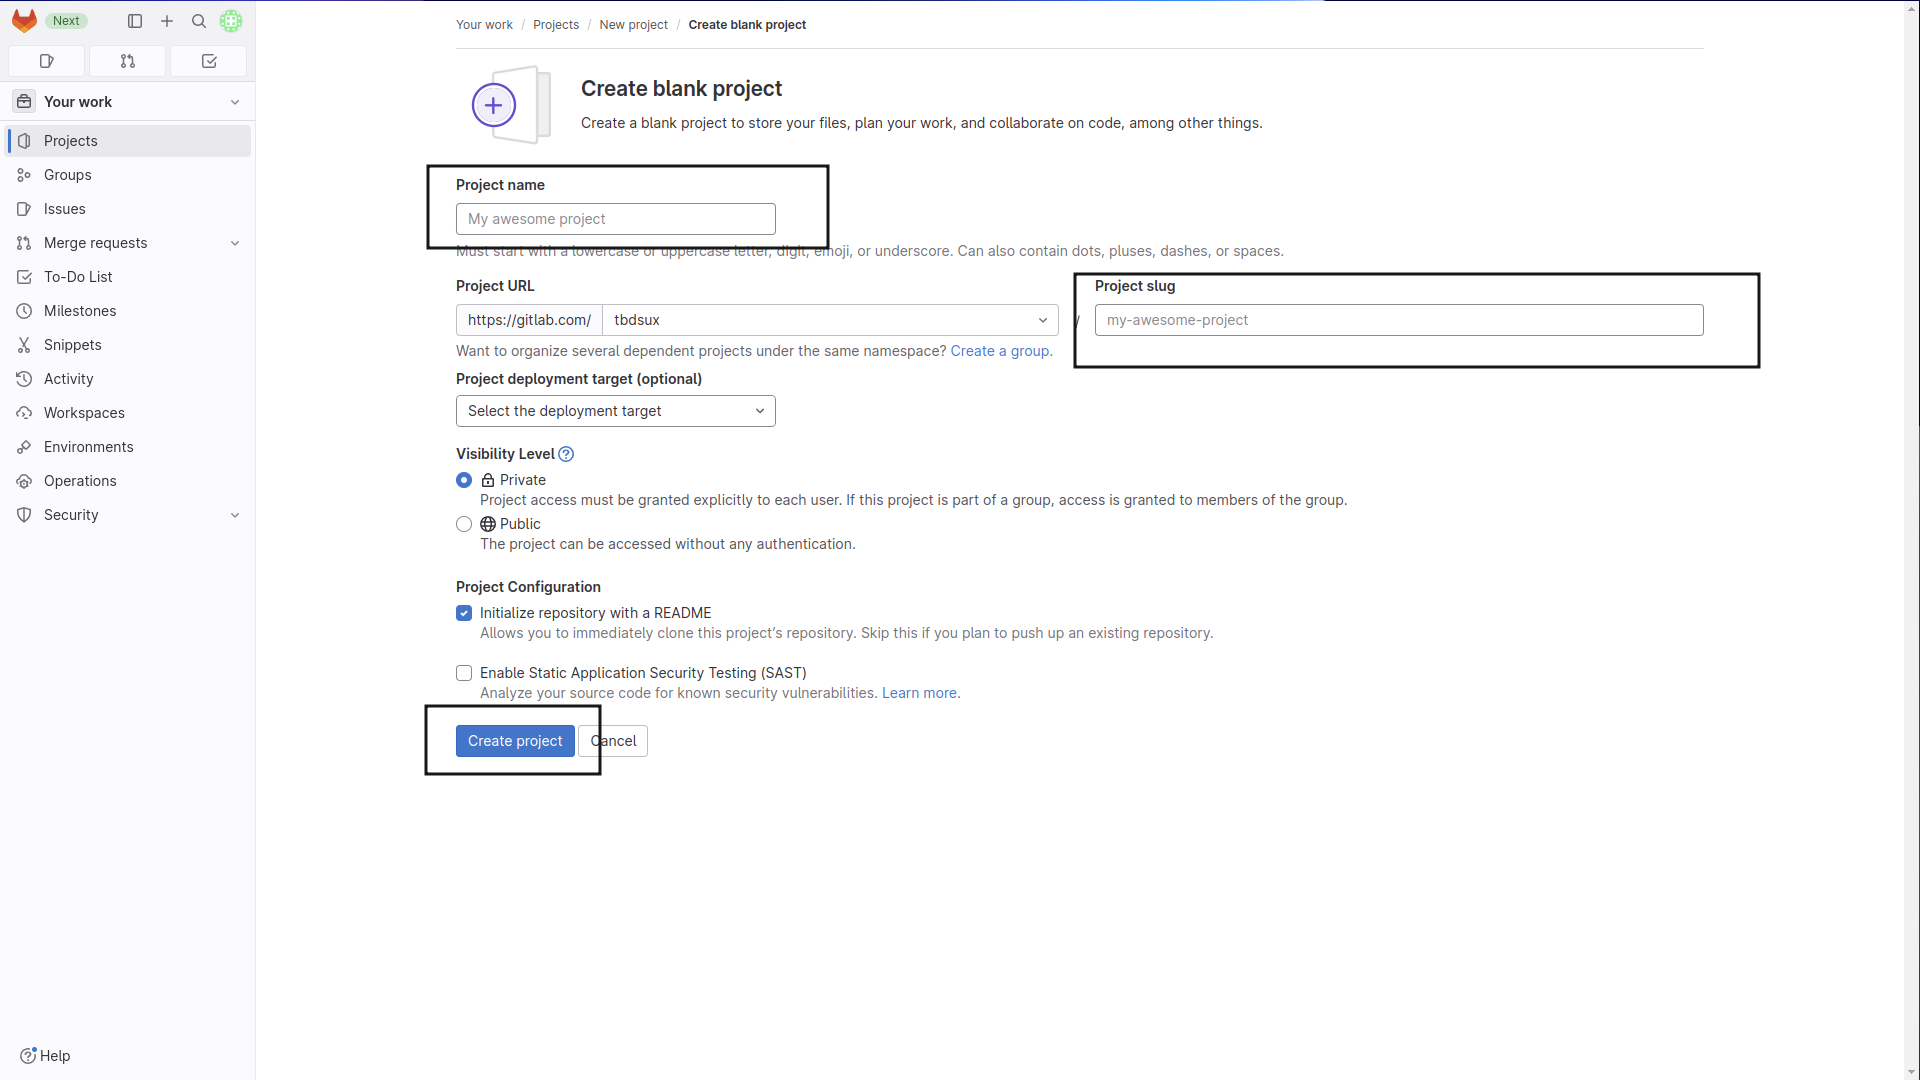
-
Copy the SSH url of your repository
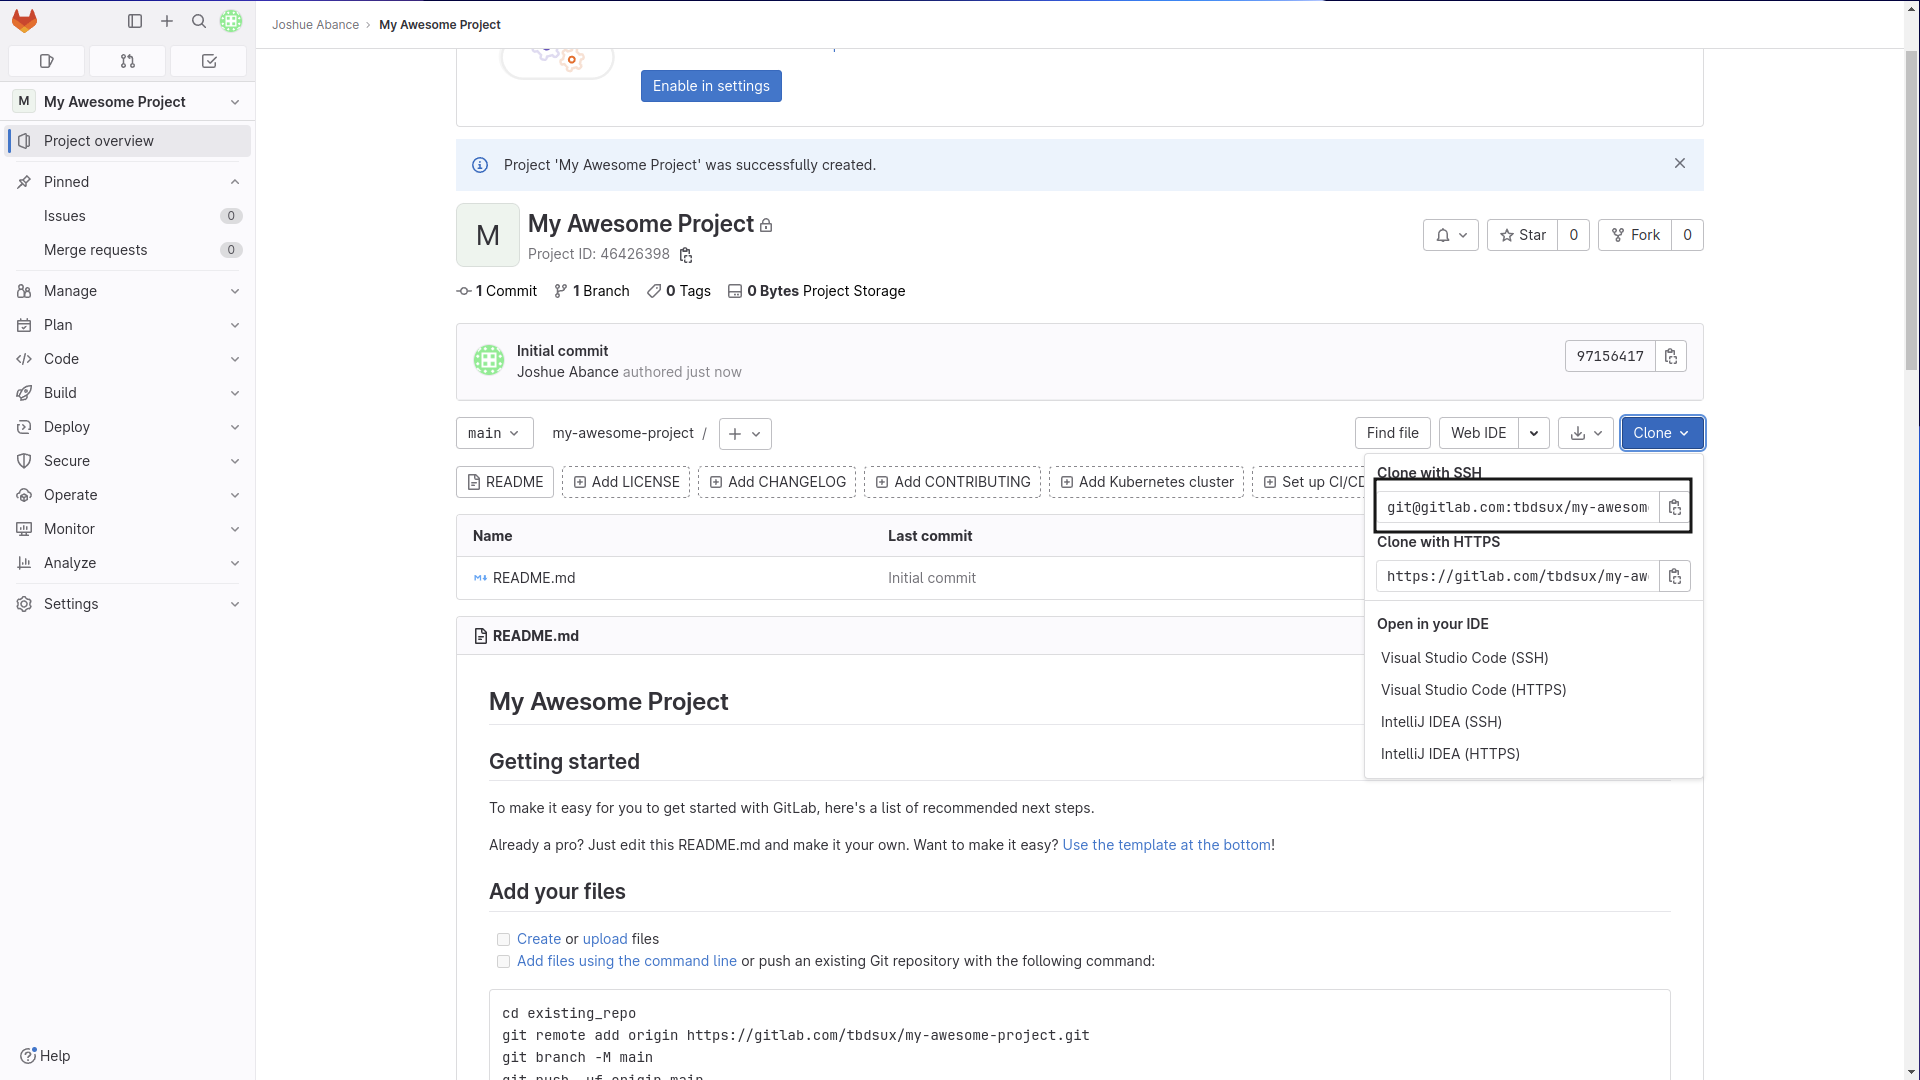
-
Copy the SSH url of your repository.
Example:
git@github.com:tbdsux/my-awesome-project.git -
Clone your project
git clone git@github.com:tbdsux/my-awesome-project.gitYou should be prompted with the following upon first setup.

Verified commits with GPG Keys
You can also get Verified with git not only on social media platforms :)
You can sign commits and tags you make for your repository. When you add a cryptographic signature to your commit, you provide extra assurance that a commit originated from you, rather than an impersonator.
-
Download and Install the GPG command line tools
It usually comes pre-installed on some Linux OS distributions.
-
Open your Terminal
-
Generate a GPG key pair by running the command
gpg --full-generate-keyWhen prompted:
- Select
RSA and RSA 4096- Set expiration for the key (
0for not expiring) - Add you real name and email address you setup on your Github and Gitlab account with your git
- You will also be required to add a passphrase (You can also not have a passphrase)
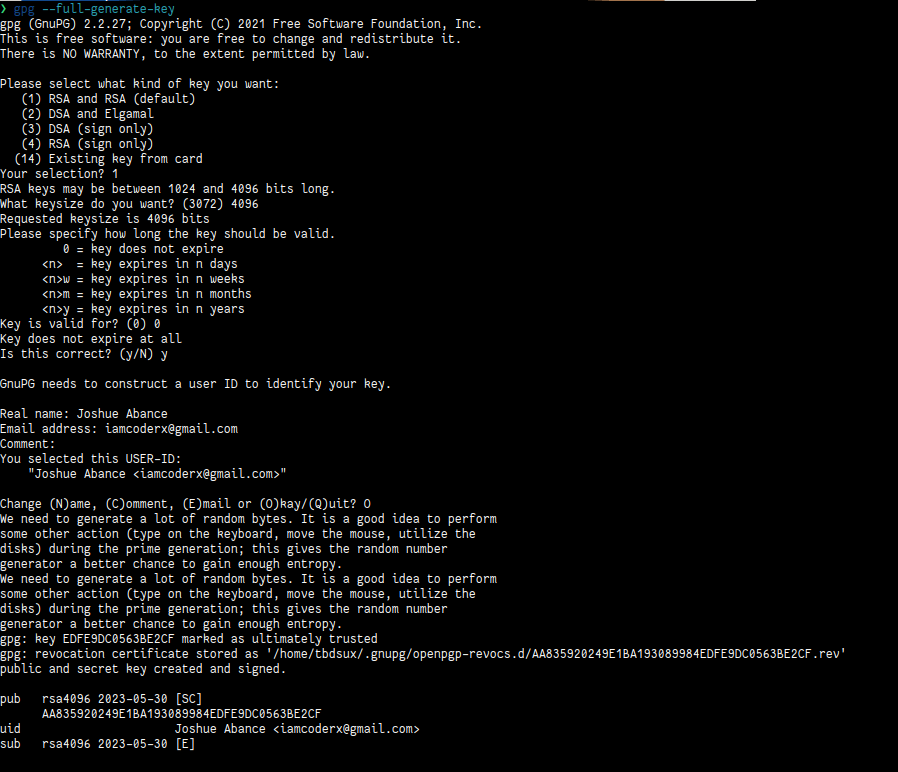
- Select
-
List the keys you have
gpg --list-secret-keys --keyid-format=long # gpg: checking the trustdb # gpg: marginals needed: 3 completes needed: 1 trust model: pgp # gpg: depth: 0 valid: 2 signed: 0 trust: 0-, 0q, 0n, 0m, 0f, 2u # /home/tbdsux/.gnupg/pubring.kbx # ------------------------------------ # sec rsa4096/EDFE9DC0563BE2CF 2023-05-30 [SC] # AA835920249E1BA193089984EDFE9DC0563BE2CF # uid [ultimate] Joshue Abance <iamcoderx@gmail.com> # ssb rsa4096/D0E7E7BEBB888F52 2023-05-30 [E] -
Show the public key. We will need this to add to our Github / Gitlab account.
gpg --armor --export <ID> # replace the ID with the ID shown above, ex: EDFE9DC0563BE2CF -
Copy your GPG Key, from
-----BEGIN PGP PUBLIC KEY BLOCK-----to-----END PGP PUBLIC KEY BLOCK-----Example:
-----BEGIN PGP PUBLIC KEY BLOCK----- mQINBGR1w1cBEADREMufVqZIwDohii1+imy5zwMx1ldWdOwlunb9eE2cZzbhzq6g ... CVxc2bBZp30LcbfVC+nZV02g56S8ci8nuSVfr/Ne4kMRwDs2l9O2S8WuaaJJfhA= =eJHe -----END PGP PUBLIC KEY BLOCK----- -
Add the keys to your accounts
-
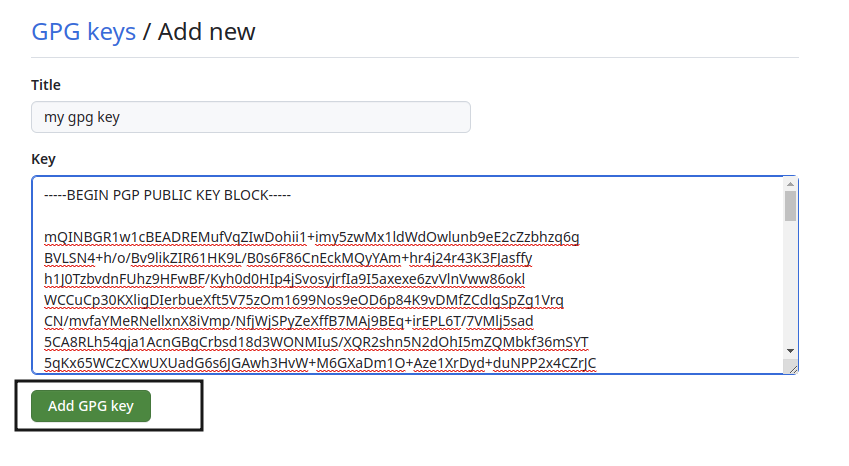
Go to your
Settings>SSH & GPG Keys>New GPG Key(https://github.com/settings/gpg/new) -
Add your key
-
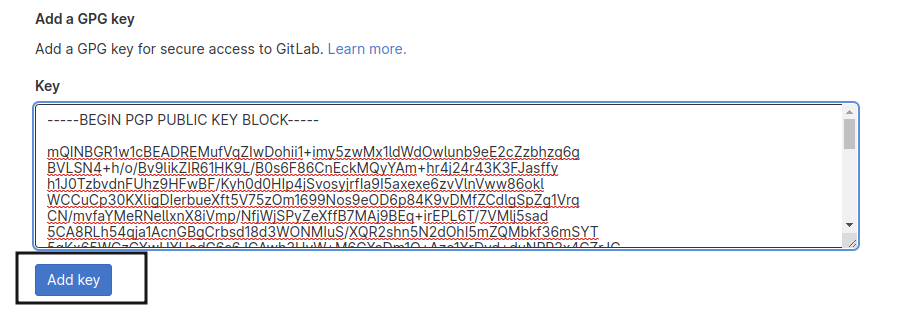
Click on your profile icon >
Preferences>GPG Keys(https://gitlab.com/-/profile/gpg_keys) -
Add your key
-
Add our GPG Key to Git.
Set our primary GPG Signing Key
git config --global user.signingkey EDFE9DC0563BE2CF # replace with your gpg key id -
Optionally, we can also configure Git to make sure we sign on all of our commits by default
git config --global commit.gpgsign true -
Once done, our commits are now verified

Other Useful Pre-Setup Commands
-
Change default editor for editing commit messages.
git config --global core.editor nano # replace `nano` with your preferred editor -
Set default branch name
git config --global init.defaultBranch